
Ever wanted to know how to use a silencer in a film without having to buy a real one? No? Well I did, and so I made a makeshift silencer. And it was even used in a 48 hour short film. In this article I’ll take you through what I did, and share some tips for creating a prop gun with no budget.
Please keep in mind before you make and use a prop gun in a film that there are safety requirements. The 1st A.D, Producer(s), and Director are all responsible for safety on a film set. In most cases you’ll need to obtain a permit, notify the local authorities that you are using fake weapons, and hire a licensed armourer, especially if used in public. The armourer is in charge of the weapons, fake or otherwise, and is responsible for instructing those who use the gun on the safety requirements. With these safety tips put in place you can begin to craft and use your prop weapons.
Do not attempt to use any weapons before observing these safety regulations. The safety of your cast and crew is your number one priority.
Here are some things you’ll need to make a homemade silencer:
- realistic toy gun
- black gaff tape
- toilet paper roll
- black sharpie marker
- uni paint marker
- scissors
Once you’ve collected these items you can begin constructing your weapon.
- Paint the gun black
The first thing I did was make sure the gun was completely black before I attached the barrel. Most toy guns, even more realistic ones, will be slightly different than real guns. They’ll have an odd colouring and a mark to show they are in-fact a toy.
The gun I worked with was pretty beat up, its paint was wearing away and there was this weird blue layer beneath the black paint. So this step can definitely be easier said than done, depending on the toy gun you get. To make it look like a real gun I used a black permanent marker and coloured in the parts that had faded to blue and white.
It’s best to use a permanent sharpie, I tried using a whiteboard marker and it just rubbed off the plastic. I would be colouring a part of the gun and then move on to a different part to realize the last part rubbed off. This step took me awhile.

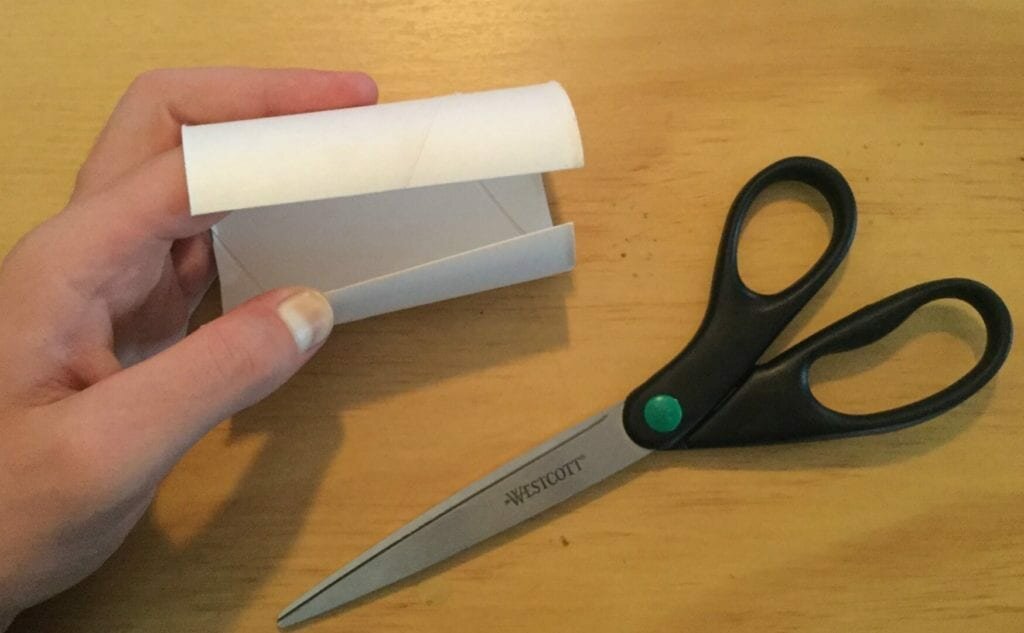
- Secure some TP and scissors
This step is more difficult to secure the items needed then actually constructing the barrel. Mostly because it was difficult to find an empty tp roll. I eventually found one though, and it looked great. If you can’t find an empty tp roll then find a creative way to take the cardboard out of the roll. It should be easy enough to push the cardboard out of the roll. But If you can find a roll without toilet paper then that would be the easiest. After I found one I proceeded to cut the roll and rolled it in on itself to make it smaller.
- Tape it up!
The last step to creating a DIY silencer is to tape up the barrel and then tape it to the gun. To do this, I rolled the barrel in on itself making its diameter about the same size as the barrel of the gun. Then I used one piece of gaff tape to hold it together and then taped it up with the gaff tape, rolling the tape around the barrel multiple times until it was all covered. I also put more tape over each end to cover up the edge, inserting the tape into the barrel and then folding it over the edge onto the surface of the barrel.

- Leave your mark
The fourth and final step is to use a uni paint marker to make marks on the compressor barrel, that is, the part that you constructed. As you can see from the first picture, the barrel has words on it, so to really hit home the believability of the weapon, I made some white marks on the barrel.

Here’s the finished product:

Now you know how to create a makeshift silencer and even some tips in creating guns for film. Make sure that you are careful with the weapon you have too, don’t play around with it in public or in a way that could potentially frighten those with weaker stomachs. That being said, you can get pretty creative with what you make, and that’s where the fun comes in!