
Showreels are some of the most important tools actors utilize to help market themselves, but how exactly do you make one? I’m here to give you some tips and tricks to help you get those creative juices flowing to make your very own showreel.
Software
When getting ready to make your showreel, you firstly need to make sure you have the right software to do so.
There are softwares you have to purchase to use as well as free software you can download in order to start editing.
Here’s a list of some that you have to buy:
- Final Cut Pro
- Movavi
- Adobe Premiere Pro
Here’s a list of free editing software:
- Lightworks
- OpenShot
- DaVinci Resolve

We, in the Initiative office, use DaVinci Resolve to edit every one of our projects. We also teach our film students how to use it.
It’s a really great editing software for showreels, and it’s free. There are many resources online to help walk you through how to navigate it. Once you figure it out, it’s smooth sailing.
From here on, I will be describing how to navigate DaVinci Resolve, since that is the editing software I use. Even if you don’t use DaVinci yourself, this information can still prove useful, as there will likely be similarities between different software.
Gathering Footage
Once you’ve gotten your software, it’s time to gather your footage. I would highly recommend asking the director of your projects if you could have a copy of the footage so you can use it for your showreel. It’s not certain they will give you the footage, but it’s always a good idea to ask in case they do give it to you. Do this for any project you’ve been a part of, even if you were just an extra, any work is helpful to showcase.
When you’ve gotten the footage, import it into your editing software.
You can do that by opening up the software, creating a new project file, and dragging the footage into the media pool section of the project.

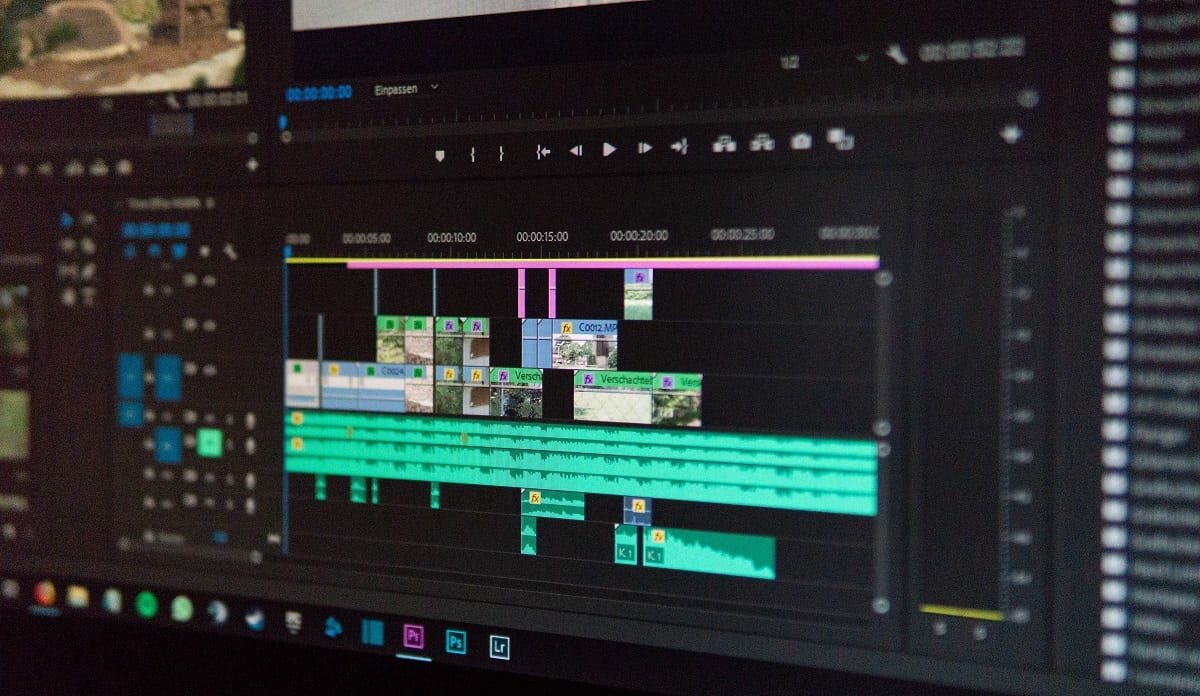
Once there, you can drag the clips individually, or all linked together onto the timeline. The timeline is the lower horizontal section.

Editing
Now, you are going to start the editing process.
I recommend putting your best work at the beginning so you showcase that up front. The casting directors don’t have the time to watch your entire showreel, they tend to skim through. Put your best work first so they have a higher chance of seeing what you’re bringing to the table.
When you drag your footage into the timeline, there’s going to be two different tracks, one for audio and one for video. Your footage should automatically sync the two tracks, but if you’re cutting together different tracks you want to ensure that your audio always syncs together with the correct footage.

When looking at the software, there are going to be many different tools all with different purposes.
The main one you’ll want to know is the cut icon. This icon cuts your footage so you can trim however much you would like.

When cutting footage, you can choose anywhere within the track to trim. You can take off parts of the beginning and the end as well as cutting multiple sections to create more clips.
Showreel Content
Your showreel should be between 2-3 minutes at most, so make sure to edit accordingly.
The opening of your showreel should be your headshot with your name. To do this, you can import a photo into your timeline by dragging the image straight onto the timeline.
From there you can adjust the length of time your photo will remain on screen, as well as add text to the picture. If your image happens to be too big, select the image on your timeline and then move over to the right of the screen under the “Inspector” tab. You can scroll down to the “zoom” section and change the size of the image that way.

To add text,
- click the tab “effects library”
- and under the “titles” section you can add a
- text box
- To add the text box to your timeline, drag the option “text” to the timeline and place it above whatever video you are wanting to add text to.
Adding text to your project is important as it’s the easiest way to get your contact information and name to the casting director. To the right of the screen you will see a tab labelled “inspector”. Click that tab once you have highlighted your new text box. You will then see a box below that tab where you can add your text. In the text box, you should write your first and last name and “showreel”.

Below the text box, there will be numbers with an “x” and a “y” next to them. These numbers indicate where exactly the words or picture is placed on the screen.
You can click these numbers and drag your cursor over them to adjust the placement of the text or picture.

A really helpful tool to use is the “safe area.” The safe area is a box that will appear over your video in the preview section, it gives you guidelines of where it is safe to adjust text and pictures so that when the video is playing nothing gets cut off.
To open the safe area, click the view tab at the very top of your screen and down near the bottom you will see a section called “safe area”. Click that and the safe area will appear on your image.
I would recommend using this, especially when starting out because you won’t have to worry if your picture will show up correctly.
You should have 2-3 examples of longer footage of your work, 30 seconds at maximum. After the first few examples, you should add several clips from different works you’ve done, in a montage.
Over the montage, it’s better to add music rather than have the original audio because it’s mainly there to show your range. The reason why it’s better to put music over the montage is because this section is smaller cuts from several scenes to showcase a range of emotion.
The original audio should be saved for the opening scenes, that’s where the best quality performances should go.
You can find royalty free music online and use that in your showreel. YouTube has a library full of free to use audio for anyone, I would suggest looking there. Once you download the music you’re wanting to use, drag it again into your timeline and place it below the audio you are wanting it to replace.
To mute the original audio from your clip, click on the audio track you are wanting to mute and press “D”. This will mute only that track, then you can replace it with the audio you are wanting to use.
Once all of that is finished, drag your headshot once again into the timeline, but this time at the end and add your contact information, preferably your email and phone number, or your agency information if you have one.
When you have finished everything, go back to the beginning and watch the video to see if it’s to your liking.
When you’re satisfied with your project, go to the bottom right tab on your screen, it will look like a rocketship if you’re using DaVinci, and from there you will export.
To do so, make sure your file is under the tab “Custom”.

- Under that, give the file a name .
- Then select a location to send the export. Click the browse button, and it will open up your file explorer tab and from there you can choose what folder you want your export to go to.
- Click “Add to Render Queue”.
- In the top right corner, you will see the project and under that you will see a button labelled “Start Render”. Click this button and it will begin the process of exporting your footage.
DO NOT CLOSE YOUR TAB!!! When exporting make sure you don’t close down DaVinci or you will lose the export.
When the export is finished, you should be able to find it in your file explorer. You can then copy it to a USB to give to your agent a director or upload it to whatever auditioning website you use.
I hope this article has been helpful for you and gives you inspiration to create a showreel of your own!


Show Comments