Do you, like me, ever watch a movie and think, “How did they create that look” or “I wish I was creative enough to do my makeup like that”? Well you can!
I am going to give you some tips on how to create movie quality makeup for your next project!
If you already know how to do your own personal makeup, well, that’s wonderful! Although, given the camera catches everything, you may need to go a bit lighter on the foundation than usual because you don’t want to look unnatural. It may look beautiful in person, but the camera isn’t as forgiving.
For those of you that don’t know how to do your own makeup, or are not as familiar as you would like to be, here are some tips.
When starting a look always make sure to use a primer, this is a product that helps to prep your face for the makeup and helps the makeup adhere better.
After your primer you will add your foundation. Make sure your foundation matches your skin tone well.
A good trick to check if your foundation matches or not is to put a little on your neck and blend it in. If the foundation seems to disappear into your skin then you have found the correct colour.
When applying foundation make sure to blend outward from the face, this helps to hide any baby hairs or peach fuzz you may have around the jaw or anywhere else.
You can use a foundation brush, a beauty blender or your hands if you really need to, but a foundation brush is recommended. Beauty blenders are fine as well, but it is best to try to get the silicone one if you can, since the sponges soak up a lot of the product.
If you have any peskier areas, especially under the eyes, that are not as willing to hide after foundation feel free to grab some concealer and fix those areas.
Again, you are welcome to use whatever tools you would like, but brushes are preferably going to be your best friend in this process.
After this you want to set it. To do that grab a skin coloured pressed powder and lightly brush it along your face. This helps to set the foundation and give a more natural soft look to it. (If you have a foundation with a matte finish you don’t need to set it.)
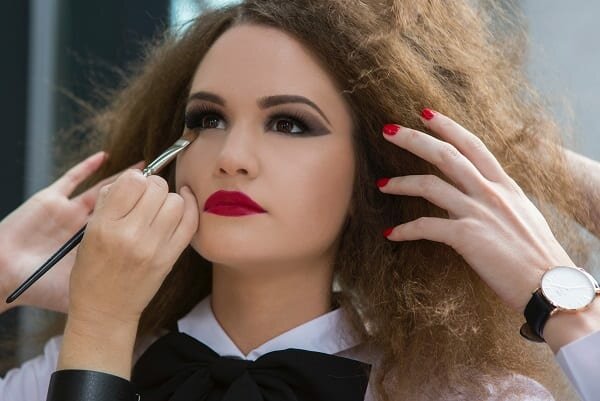
Once you’ve finished your foundation, it’s time to move onto the eyes. For films you don’t need an excessive amount of eye makeup unless the script calls for it. A simple, more natural look is usually prefered.
To do that, I like to use an eyelid primer first to help adhere my eyeshadow for longer.
Once that has been applied, I grab my eye shadow.
For a more natural look, I will stick to neutral tones such as nudes, browns, yellows and pinks, but feel free to use whatever colours best suit your natural skin tone.
I tend to start my eyeshadow with a medium colour on my lid. I use an eyeshadow blending brush to place the colour on the lid and blend it a bit outward toward my eyebrow.
It’s good to remember that eyeshadow should never touch your eyebrow but should rather dissipate the closer it gets to the eyebrow.
After I’ve applied the medium tone, I then grab the next darkest colour and blend that colour into the crease of my eyelid. This helps to give depth to your eyes.
When I have finished blending the medium and dark tones together, I grab the lightest shade and blend that into the tear duct area and out toward the medium tone. This brings the whole look together and helps to widen your eyes.
Then you move onto mascara. You are welcome to use whatever type of mascara you would like, I personally use non-waterproof mascara just because it’s easier to remove when the time comes, but depending on the shoot, waterproof might be best.
You can use an eyelash curler if you would like before applying your mascara, but it’s not required. When applying mascara, make sure not to touch your eyeshadow and you should be fine.
No look is complete without working on your eyebrows. I personally use a small eyeshadow palette that has a colour fitting to my eyebrow for filling in my eyebrows, but there are many great eyebrow kits out there for you to use. Just make sure to find the one that suits your eyebrow colour the best.
I use a small slanted brush to fill in my eyebrows, I get some of the eyeshadow and outline my brows first, and then blend the colours inward to fill in the rest of the brow.
Make sure to follow your natural brow shape don’t make a solid line. The inner part towards your nose should be a little sheer and not as filled in. This gives a more natural look to your eyebrows.
After all of this, you will want to begin contouring. For contouring, t’s important to know how dark to go. For best results, pick a colour that is up two shades darker than your natural colour.
This helps to blend easier and looks more like natural shadow. You can use cream or stick, whichever you prefer. I use a stick myself, but that’s just my personal preference.
When contouring, remember to keep the ideal face shape for your gender in mind. For men the ideal face shape is a square, for women it’s an oval.
At its core, contouring is creating shadows on the face to give the illusion of a different face shape.
Outline your face with the contour, but lightly, don’t use too much product, that can prove disastrous. Check around your hairline on your forehead and your jaw line. After you’ve done this, suck your cheeks in.
This will help you to find where your cheekbones are. From the edge of your face downward following your cheekbone, create a small line with the contour. The line doesn’t need to go all the way to your mouth, just a little ways down works wonders.
This will help to accentuate your cheekbones and give more depth to your face.
Once you’ve done this, grab a brush and blend blend blend!
Make sure to blend outward, don’t be afraid to blend a bit into your hairline when working on your forehead. This will give the illusion of shadow which is desired.
Blend until there are no solid lines on your face from any angle. If you need, feel free to ask a friend to check for you in the harder to see areas like your jawline.
After contouring, take a bronzer and lightly go over the contoured areas to set and define the contour.
Then to the lips. Depending on the look your director is going for, you may use lipstick or lip gloss or nothing. For this example, I will be using matte lipstick.
It’s highly recommended to use a lip-liner when working with lipstick, but if you don’t have one that’s okay.
Lip-liner helps to create a guideline and barrier so you won’t smudge your lipstick outside your actual lip. Line your lips on the very edge and then apply your lipstick. You are free to add a gloss to them afterwards or leave them as they are.
When you have finished all of this, use a setting spray if available. If you don’t have one, that’s okay. It’s not a requirement, but it is helpful to keep this look for longer.
Thank you so much for giving this a read! I hope this sparks some inspiration for your next film adventure!

